
Using MCP
Learn how to start the Quiet Typist MCP server and connect it to clients such as Codex, so agents and automated workflows can use offline transcription results.
Quiet Typist exposes its local transcription through MCP, so you can plug it into any MCP-capable client or automated workflow. Transcription can run entirely inside an offline network, and your audio and video files never have to be uploaded to an internet service, which makes it a good fit when privacy and security matter.
1. Start the MCP server
Open Quiet Typist, go to the MCP page, and turn on Enable MCP Server.
Keep Quiet Typist running after the server starts. External clients can only use local transcription while the app is open.
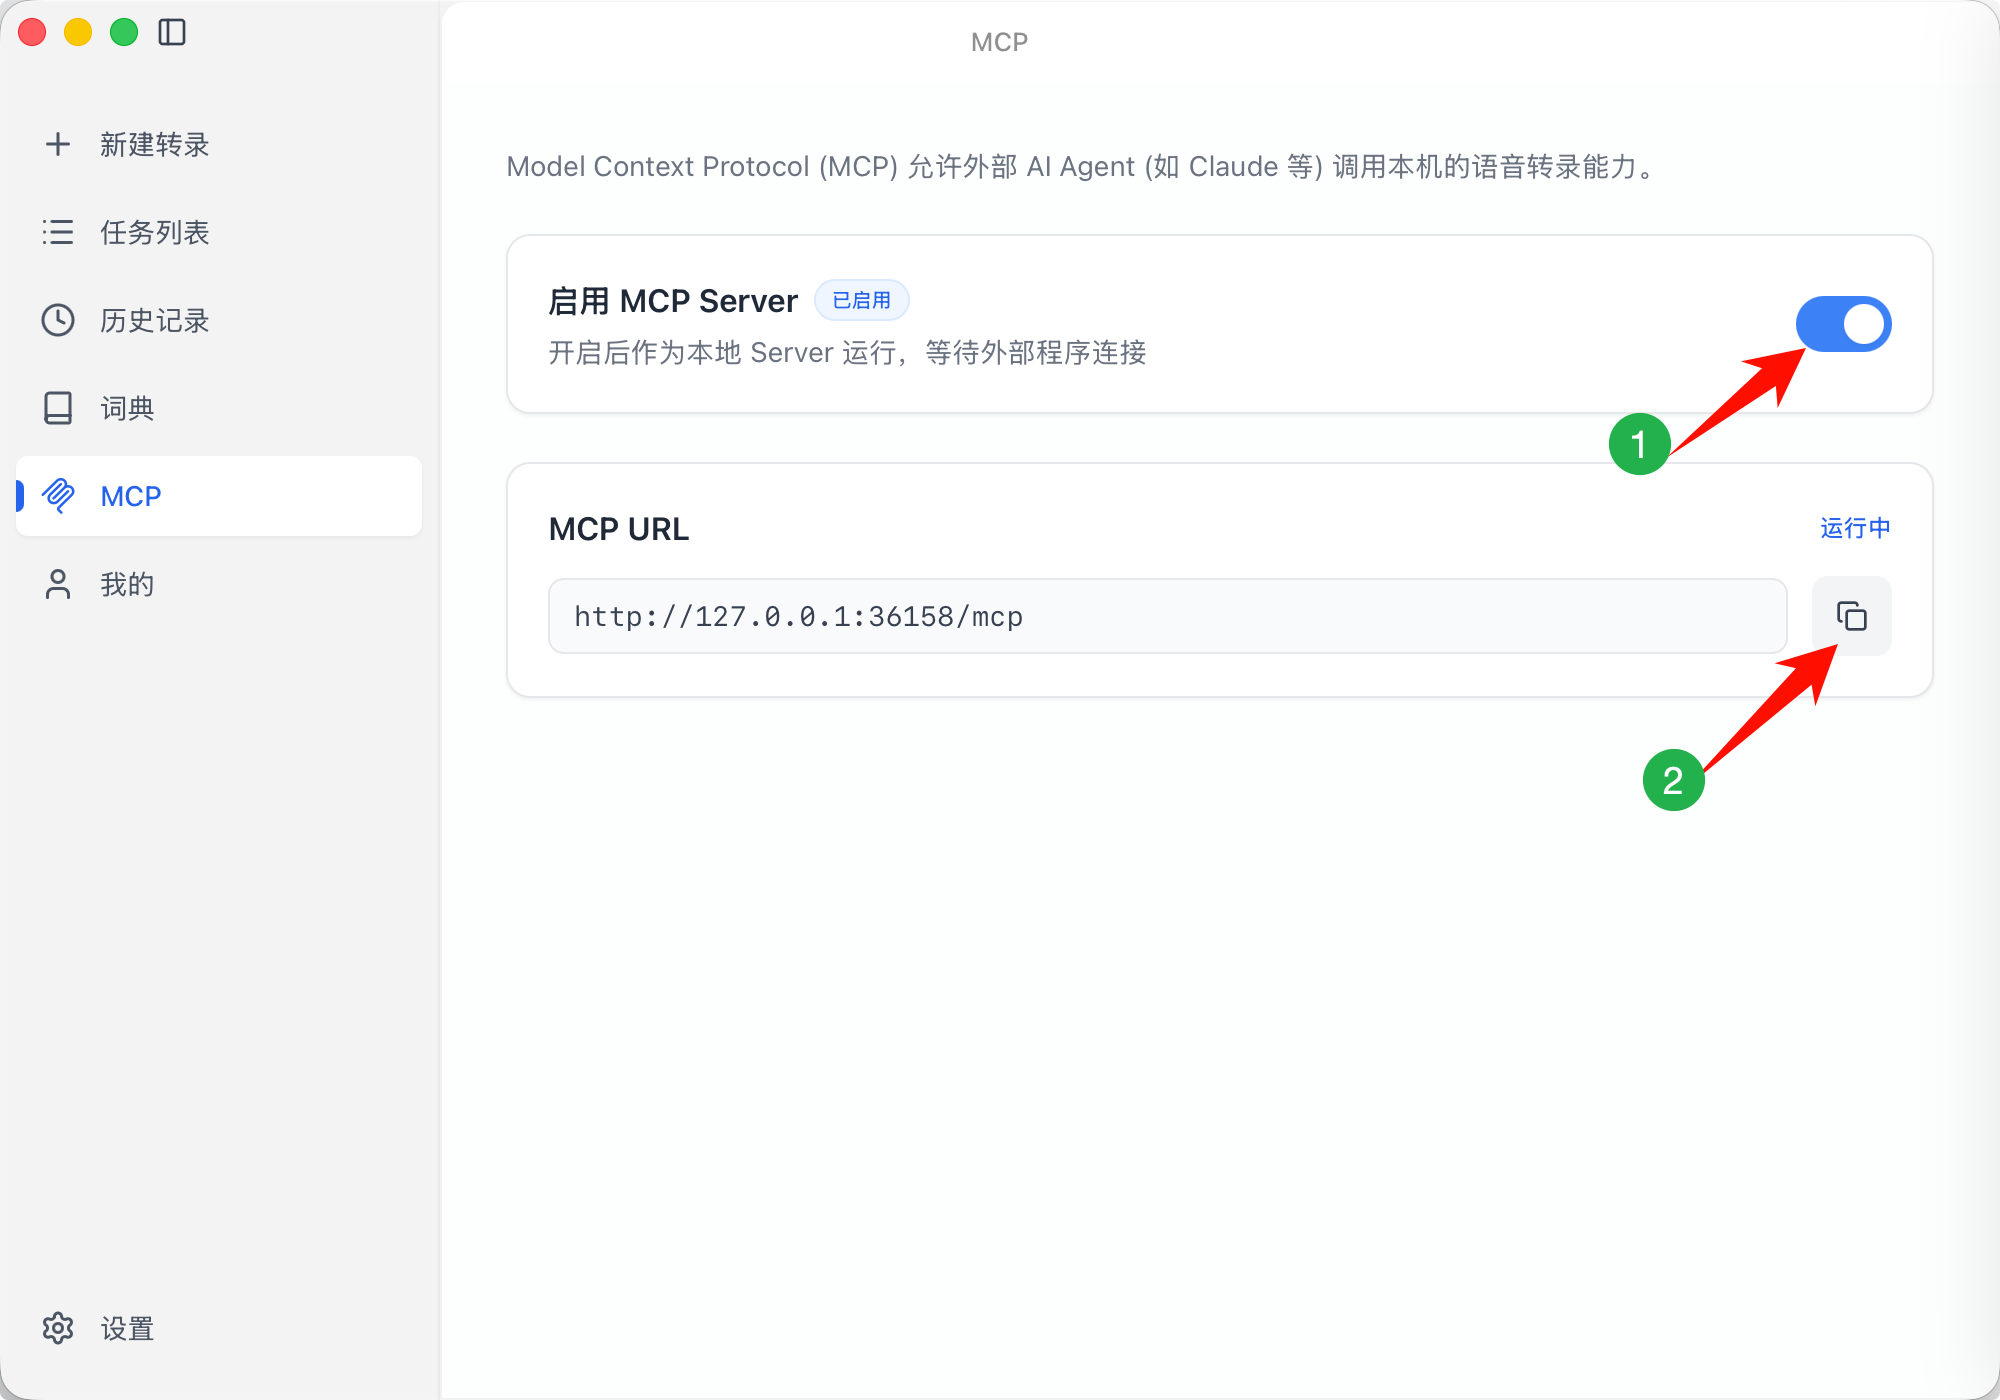
2. Configure your MCP client
Add the Quiet Typist MCP server to a client that supports MCP.
The example below uses Codex. Fill in the server name, command, and arguments as shown on the page. For other clients, and for letting an agent set things up for you, see MCP Setup.
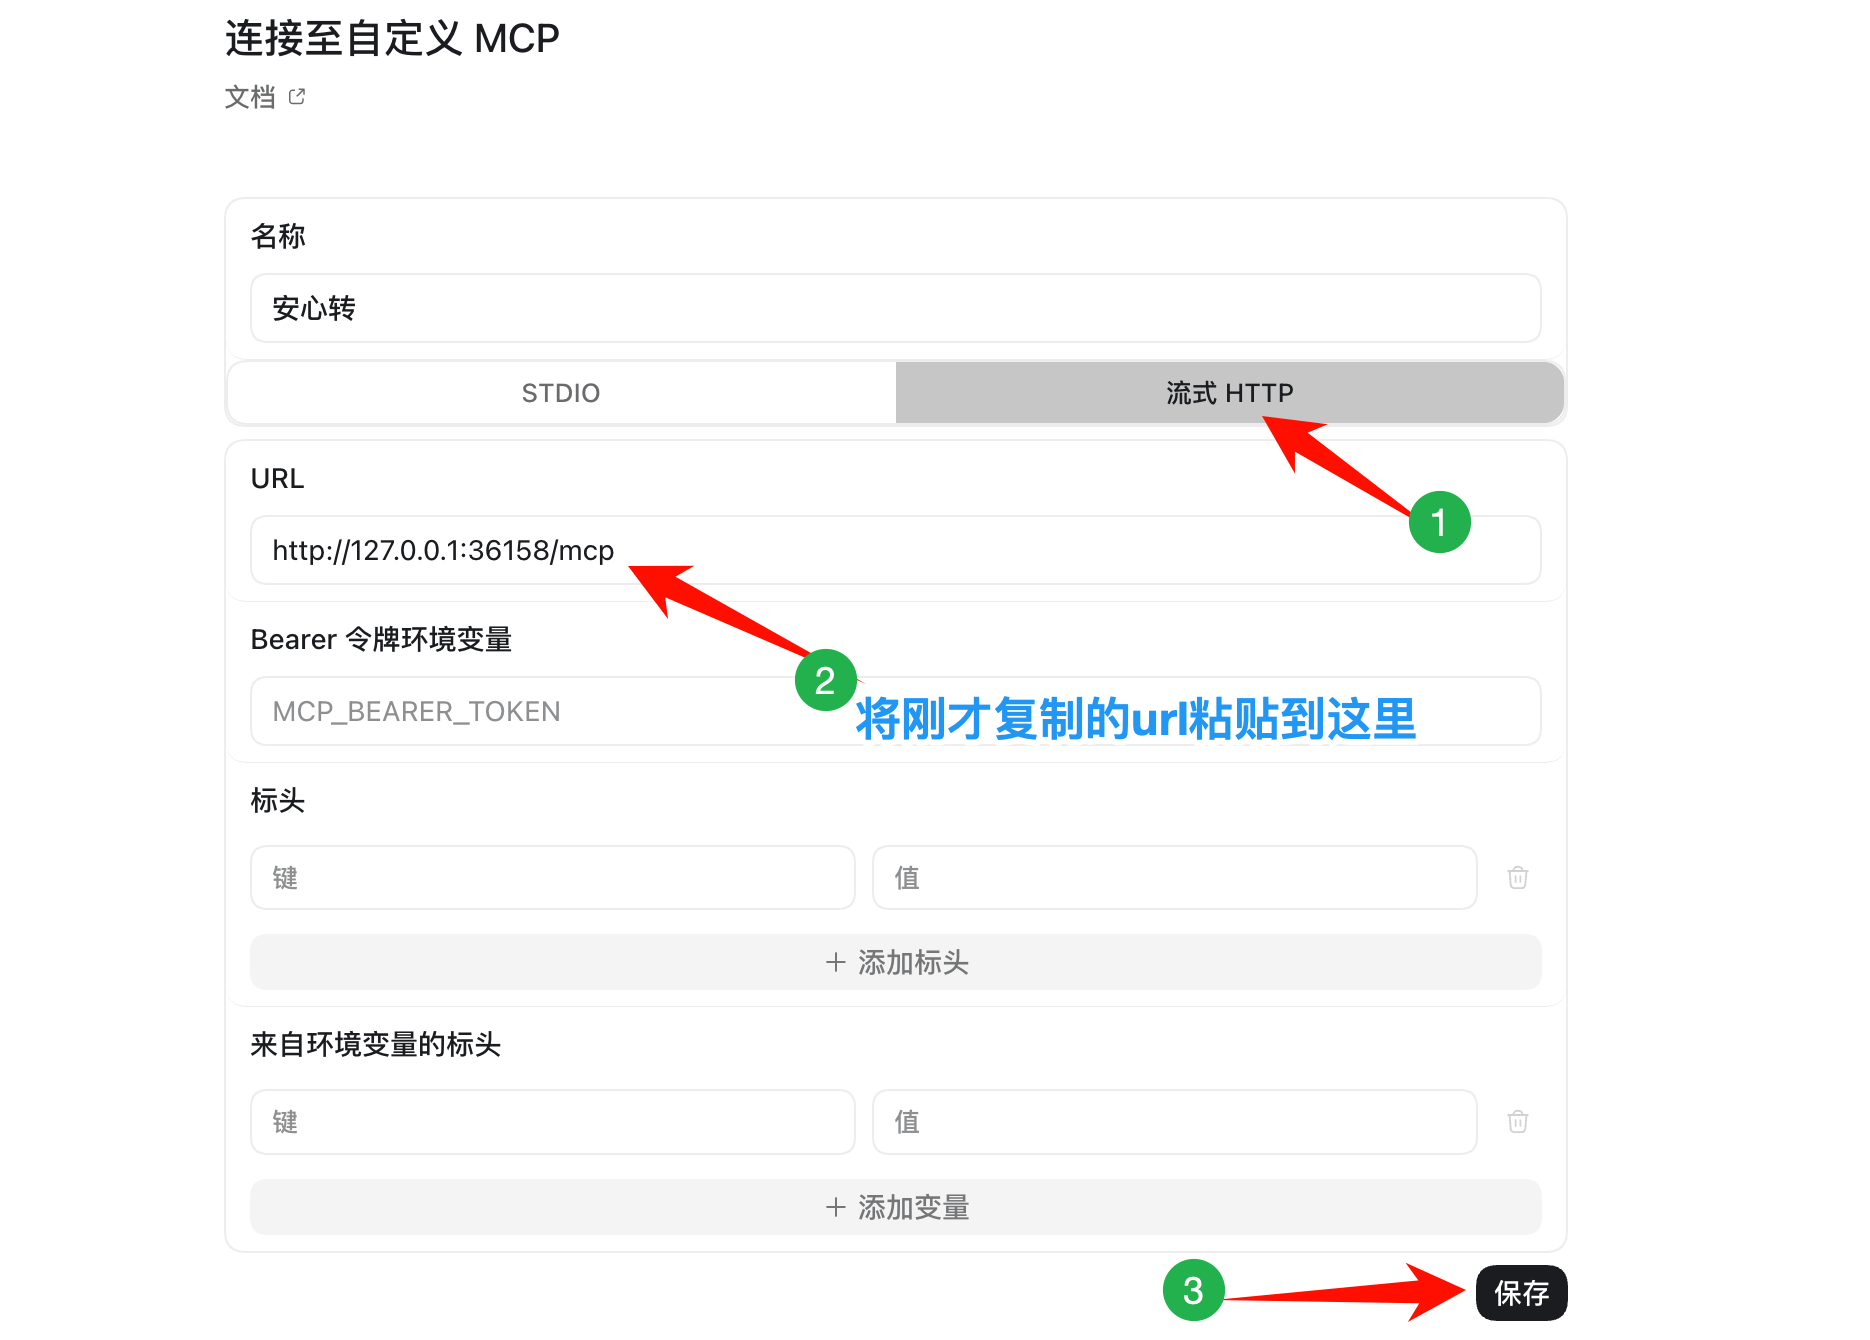
3. Transcribe local files
When you're done, refresh or restart the MCP connection in your client.
Once connected, your client can ask Quiet Typist to transcribe local audio or video files and get the text back.
Related
- Batch transcription: see how multiple local files are transcribed automatically, one after another.
- Quiet Typist Quick Start: import files in the app and view the transcripts.
Quick Start
Learn how to import audio and video files into Quiet Typist, batch transcribe them offline, and review transcripts with timestamps and speaker labels.
MCP Setup
Send a prompt to your agent to connect Quiet Typist MCP automatically, or add the local transcription server manually in Claude Code, Codex, Cursor, or VS Code.